
Compliance
Within this chapter the Compliance Norms can be added.
- In our example we have ISO9001, NEN7510-2, a Company specific norm and HKZ norm.
- You may add as much Norms as you like and add the requirements to each norm. Click the +(plus) icon to add a Norm
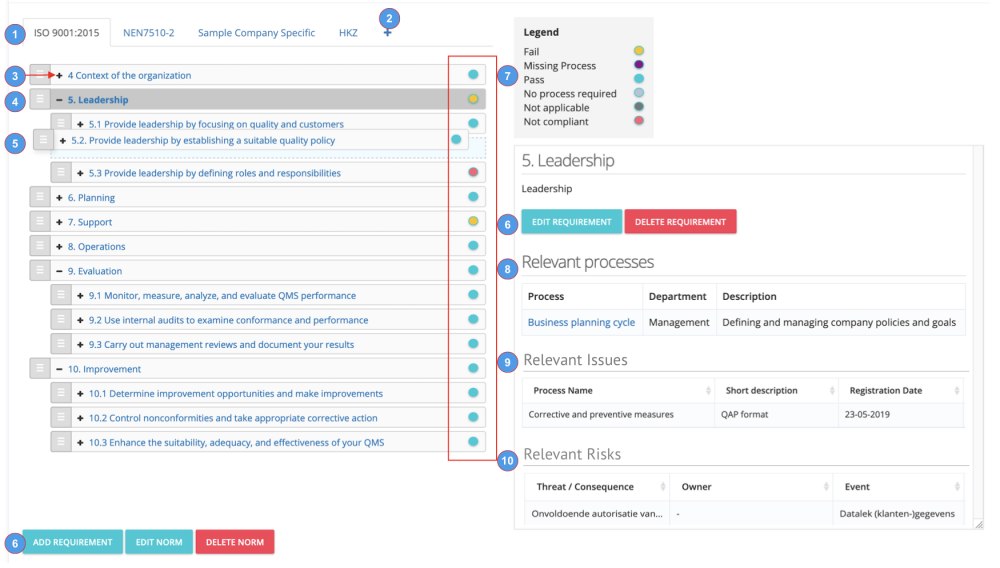
- The + in the requirements will open up the underlying sub,
- The - will collapse it again
- In case you made a mistake in the order of any requirement, simply grab the grey ≡ part of the line and drag it to the desired position. Each requirement can consist of chapters and subchapters up to 4 levels deep.
- From this screen you can add, edit, delete both the norms as well as the requirements.
- The dots to each requirement will get a color to indicate the compliance status to each requirement. This layered structure has a waterfall logic behind it so the top level requirement will inherit a status from a sub level requirement. So even when the tree is in collapsed view, you can imideately see the compliance status throughout the selected norm.
Orange -> Fail. Occurs when an underlying requirement has a status Fail, Missing Process or Non Compliant.
Purple -> Missing process. Occurs when a requirement has the switch require process set to yes, but no process is linked to the requirement
Blue -> Pass. Occurs when: if all others are not true
Light grey -> No process required. Occurs when the applicable switch at the requirement is set to no
Dark grey -> Not applicable. Occurs when the applicable switch at the requirement is set to no
Red -> Not compliant. Occurs when there is an open Issue and/or an audit result registered. When an underlying process has an issue which is linked to multiple requirements, all requirements linked to that process will be marked non compliant. - For each requirement the detailed description is shown and in case processes are related the linked processes are shown also.
Clicking on the process-link will open the details of that linked process. - Open issues related to this requirement will also be shown to this detailed screen so they are tracked easily.
- Relevant (open) Risk Treatments are also shown here for follow up.
Create Norm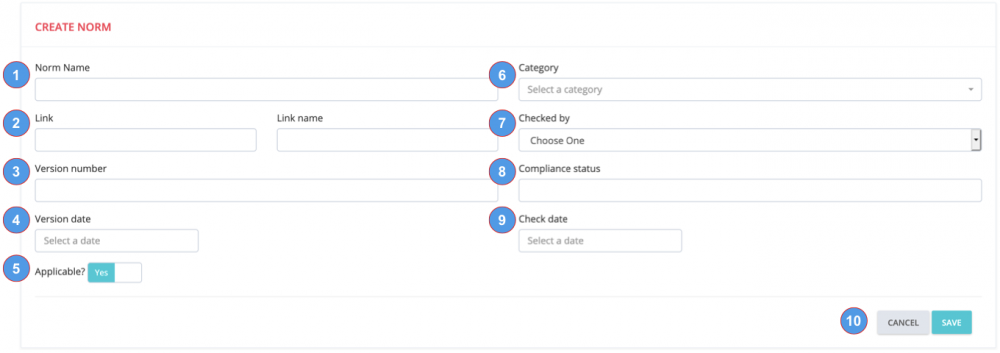
Clicking the button "Add Norm" will invoke a new screen to add a new norm.
- Add the norm name
- Add a link and a link name
- Add the actual version number
- Add a version date for the norm
- Select if the norm is applicable or not.
- Select the norm category from the dropdown.
- Select a name from the list checked by.
- Add a Compliance status
- Add the date when this was checked
- Press save to store or cancel to ignore.
Create Requirement
Clicking the button "add requirement" will invoke a new screen which allows you to add a new requirement.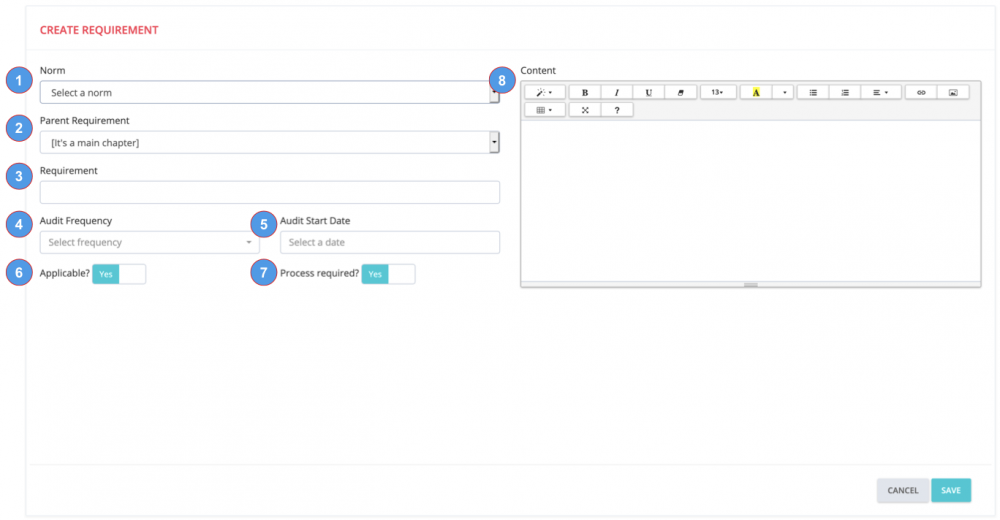
- Select the norm to which this requirement belongs to
- Select the parent requirement or if its the main chapter, leave as is
- Add the actual requirement
- Select the audit frequency for this requirement from the dropdown
- Select the date of the first audit
- Indicates of the requirement is applicable or not. If not, an exclusion argument must be entered
- Indicate if there is one or more processes required to this requirement
- Add the content/explanation of the requirement
Then press save to store the requirement
Deleting a norm or requirement should not be taken lightly. A warning is showed to confirm the actual delete action as there is NO option to undo this when approved!
